NVIDIA’s Jetson Nano (NVIDIA X1 CPU) platform is one of the most popular embedded systems for any application that involves video processing. The standard development environment for it is a Ubuntu based system, whilst this is fine for simple development and prototyping, it is not really ideal for a serious production ready embedded device based off a custom carrier board. One of the alternatives is the OpenEmbedded4Tegra project and their very comprehensive Yocto layer. This pretty much mirrors the support from NVIDIA’s “JetPack” system but in a more embedded friendly environment.
High on anyone’s list for an embedded product should be device security – typically this may involve a trusted boot chain and disk encryption. While nothing can be said to be 100% secure (Just ask NVIDIA and Nintendo about jailbreaking earlier Switch Hardware via secure boot exploits…) you can at least do your best to make it as hard as possible and deter competitors who would like to reverse engineer your device.
NVIDIA support both Trusted/Secure Boot and Disk Encryption – however, the sticking point is that they do disk encryption via a Trusty TEE which is not supported on the Nano platform. The reasons for this are not made entirely clear, but a search of the forums usually results in being pointed to their Security Guide. By using their recommended approach for Secure Boot you can ensure everything up to the u-boot stage is trusted, and thus only your signed binaries will run. U-boot can then be made to only load signed Kernel “fitImages” to continue the chain of trust to get you into the Linux kernel (which is reasonably assured to be “your” kernel).
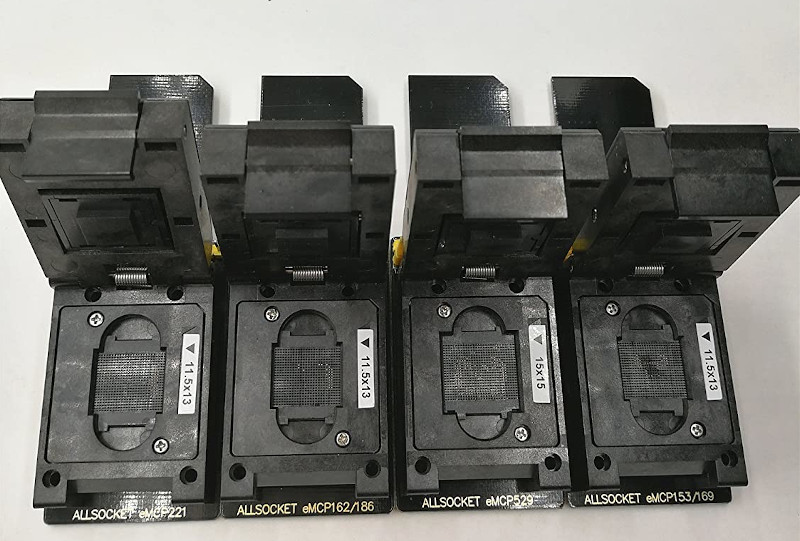
However while it stops your hardware from being used to run alternative software it does nothing to protect any IP you have in your software. It is remarkably easy these days to remove an eMMC chip from a board, purchase an adaptor and just read the chip as if it is an SDCard (The two have related command-sets and most SD Card drivers will handle eMMC). If you’re handy with soldering you can do it cheaper by often just cutting tracks and soldering flying leads on.

So given that physical access to the root file system is comparatively easy the best option is to make it harder to actually access the data – The usual method is full disk encryption, with a 128/256 bit or higher cipher that makes a brute force attack computationally expensive. However this requires the use of a filesystem decryption key, a key that cannot be easily extracted, even with physical access to the hardware. Thus disk encryption isn’t much use if you have nowhere to securely store the key. Fortunately most embedded platforms provide some hardware method of protecting such keys – however this isn’t forthcoming with the Jetson Nano.
The opensource infrastructure has a few very nice tools that can help. Disk encryption is well supported using dm-crypt as with direct/plain encryption or using LUKS. The difference is that LUKS adds metadata to allow the support of multiple keys and other friendly features where as the “plain” mode does raw sector encryption with no meta data. In desktop environments you would have a passkey or phrase that then unlocks the key and allows dm-crypt to mount the encrypted disk via Device Mapper. In an embedded system the key to security, so to speak, is protecting the key.
While not documented in any easy to understand or examinable way the X1 CPU has an integrated Security Engine. The Technical Reference Manual does not go into any of the details of it, other than showing it in the block diagram. However, there is a Linux Driver for it and source code available for use with their Trusty security application. Both of these can give useful insights into it’s operation.
The device driver creates a node as the user-space interface, allowing applications to directly make use of the Security Engine.
/dev/tegra-cryptoThe source code for this inside (via the tegra kernel at OE4T) nvidia/drivers/crypto/tegra-cryptodev.c shows some interesting ioctls. (Userland header is here).
case TEGRA_CRYPTO_IOCTL_NEED_SSK:
case TEGRA_CRYPTO_IOCTL_PROCESS_REQ:
case TEGRA_CRYPTO_IOCTL_SET_SEED:
case TEGRA_CRYPTO_IOCTL_GET_RANDOM:
case TEGRA_CRYPTO_IOCTL_GET_SHA:
case TEGRA_CRYPTO_IOCTL_GET_SHA_SHASH:
case TEGRA_CRYPTO_IOCTL_RSA_REQ_AHASH:
case TEGRA_CRYPTO_IOCTL_RSA_REQ:
case TEGRA_CRYPTO_IOCTL_PKA1_RSA_REQ:
case TEGRA_CRYPTO_IOCTL_PKA1_ECC_REQ:
case TEGRA_CRYPTO_IOCTL_PKA1_EDDSA_REQ:
case TEGRA_CRYPTO_IOCTL_RNG1_REQ:
Once of the more curious ones is TEGRA_CRYPTO_IOCTL_NEED_SSK (where SSK refers to Secure Storage Key)
Looking at the driver code relating to it shows.
case TEGRA_CRYPTO_IOCTL_NEED_SSK:         ctx->use_ssk = (int)arg;
break;
Where ctx is the device context structure created when the device was opened.
Digging though the publicly available source code for Trusty, which is not supported on the Nano/X1 but is on their other platforms (and making the assumption there are not any massive architecture differences) – there are some example test apps and a library which use the above driver. The library declares a function which is used to perform encryption and decryption:
/*
 @brief proceed Tegra crypto operation
 *
 @param *in            [in] input pointer of the data for crypto op
 @param *out            [in] output pointer of the result
 @param len            [in] the data length
 @param *iv            [in] the pointer of initial vector
 @param iv_len        [in] the length of initial vector
 @param encrypt        [in] TEGRA_CRYPTO_ENCRYPT or TEGRA_CRYPTO_DECRYPT
 @param crypto_op_mode    [in] crypto op mode i.e. TEGRA_CRYPTO_CBC
 @param close            [in] indicate the driver to release SE
 *
 @return 0 means success
 */
 int tegra_crypto_op(unsigned char *in, unsigned char *out, int len,
         unsigned char *iv, int iv_len, int encrypt,
         unsigned int crypto_op_mode, bool close);
With this function, there is no mechanism to pass in an existing key, and looking at the implementation it explicitly sets the key to all zero:
struct tegra_crypt_req crypt_req;

crypt_req.skip_exit = !close;crypt_req.op = crypto_op_mode;
crypt_req.encrypt = encrypt;
memset(crypt_req.key, 0, AES_KEYSIZE_128);
crypt_req.keylen = AES_KEYSIZE_128;
memcpy(crypt_req.iv, iv, iv_len);
crypt_req.ivlen = iv_len;
crypt_req.plaintext = in;
crypt_req.plaintext_sz = len;
crypt_req.result = out;
crypt_req.skip_key = 0;
crypt_req.skip_iv = 0;
However it then calls the following to do the crypto processing:
rc = ioctl(fd, TEGRA_CRYPTO_IOCTL_NEED_SSK, 1);
/* Some checking happened here...*/
rc = ioctl(fd, TEGRA_CRYPTO_IOCTL_PROCESS_REQ, &crypt_req);
The implication is that where no key is provided (and ‘use_ssk’ is set to 1) then the driver uses an inbuilt Device Key – further digging shows that in this use case the driver uses a specific key slot in the hardware which appears to contain a device specific key.
Looking at how TEGRA_CRYPTO_IOCTL_PROCESS_REQ is handled brings you to this function:
static int process_crypt_req(struct file *filp, struct tegra_crypto_ctx *ctx,
                 struct tegra_crypt_req *crypt_req)
Some of the code from that function is below (Comments added by me):
const u8 *key = NULL;
/* Key only gets set if the use_ssk is false, remember that use ssk
   gets set by TEGRA_CRYPTO_IOCTL_NEED_SSK */
if (!ctx->use_ssk) key = crypt_req->key;
/* Later in the function... */
ret = crypto_skcipher_setkey(tfm, key, crypt_req->keylen);
crypto_skcipher_setkey leads into the actual NVIDIA SE driver (nvidia/drviers/crypto/tegra-se.c) , which has been registered with the Linux crypto layer. One of the callbacks for setting the AES key is shown below, with comments added to help:
static int tegra_se_aes_setkey(struct crypto_ablkcipher *tfm,
                    const u8 *key, u32 keylen)
{
/* Code removed for clarity.... */
if (key) {  if (!ctx->slot ||
      (ctx->slot && ctx->slot->slot_num == ssk_slot.slot_num)) {
      pslot = tegra_se_alloc_key_slot();
      if (!pslot) {
         dev_err(se_dev->dev, "no free key slot\n");
         return -ENOMEM;
         }
      ctx->slot = pslot;
  }
  ctx->keylen = keylen;
} else {
/* Here is the code used when key is null, which is the condition when
   ctx->use_ssk is equal to true. */
    tegra_se_free_key_slot(ctx->slot);
    ctx->slot = &ssk_slot;
    ctx->keylen = AES_KEYSIZE_128;
}
/* ssk_slot is a structure that tells the engine to use the key in slot 15 */
The calls to do the actual encryption trace though to the following:
static void tegra_se_process_new_req(struct crypto_async_request *async_req)
{
/* code removed for clarity */
tegra_se_write_key_table(req->info,
                          TEGRA_SE_AES_IV_SIZE,
                          aes_ctx->slot->slot_num,
                          SE_KEY_TABLE_TYPE_UPDTDIV);
/* code removed for clarity */
tegra_se_config_crypto(se_dev, req_ctx->op_mode, req_ctx->encrypt,        aes_ctx->slot->slot_num,false);
}
So, when we are using the SSK, the driver for the crypto engine does not try to write a key into the table as can be seen below.
static void tegra_se_write_key_table(u8 *pdata, u32 data_len, u8 slot_num,
                      enum tegra_se_key_table_type type)
{
/* code removed for clarity */
  if ((type == SE_KEY_TABLE_TYPE_KEY) &&
     (slot_num == ssk_slot.slot_num))
         return;
/* code removed for clarity */
}
The earlier call to tegra_se_config_crypto() goes though a few case statements and eventually ends in some hardware writes into the crypto engine to do the actual hardware configuration, and to set the key slot being used. Then data is then flowed through the engine by configuring it’s internal data transfer registers.

The take away from this operation stream is that at no point does the actual key being used ever get seen outside of the hardware cryptographic engine. It is a key that is internal to the hardware, stored in slot 15, and therefore potentially unique to the device. It’s a that we can indirectly use by asking the crypto engine to encrypt and decrypt.
To test this, a simple application that sets up the tegra_crypt_req and calls the IOCTLs can be written. If the input data is known then any differences in output are due to the key being different.
Input Data  :
0x54 0x68 0x69 0x73 0x20 0x69 0x73 0x20 0x61 0x20 0x74 0x65 0x73 0x74 0x20 0x73 0x74 0x72 0x69 0x6E 0x67 0x20 0x30 0x31 0x32 0x33 0x34 0x35 0x36 0x37 0x38 0x39

Output Data (Board 1):
0xBA 0xEB 0xA8 0xB8 0xD1 0x3E 0x47 0xBC 0xC0 0xA1 0x45 0xC9 0xED 0x46 0x6F 0x57 0x4D 0x1C 0x3D 0xB6 0x40 0xA1 0x1A 0xB9 0x7D 0x2D 0x06 0x39 0x78 0x02 0x8D 0x6D
Output Data (Board 2):
0x62 0x7F 0x8F 0xFF 0xE1 0x22 0x6B 0x78 0x5C 0x42 0xC7 0x6F 0x85 0x58 0xF6 0xF5 0xD7 0xD3 0x31 0xCC 0xBC 0x5F 0x96 0x52 0xA1 0x15 0x91 0x7F 0x42 0x8D 0xD6 0x21
Tests with multiple reboots, and power cycles proves the data is consistent and not the result of random initialisation values. With this knowledge it brings a way to help secure the disk encryption key without using Trusty.
Thus we can encrypt a filesystem with a randomly generated key, and then use the crypto engine to encrypt this key (with its internal SSK) for storage alongside the filesystem (this is analogous to the approach taken on i.MX platforms with CAAM blobs). Now if you have physical access you can extract the encrypted filesystem and the encrypted key – but nobody has access to the key needed to decrypt the encrypted key – the only way to decrypt the key is to ask the specific NVIDIA X1 to do it for you. If you’ve secured the software well enough (secure boot and security hardening) then this should be extremely difficult.
While this approach is probably not as secure as the techniques on later generation Tegra systems with internal direct storage for the disk keys it does give a level of protection against someone extracting the storage eMMC and examining it. It also shows that disk encryption on a Jetson Nano is achievable and effective.

Something to note is that you can never prove something is 100% secure, you can only ever prove it is not secure (By gaining access). So you are always at the mercy of software exploits, hardware exploits and other tricks. The usual plan in a commercial environment is to make it uneconomical to do the work.
It’s also worth being aware of import/export restrictions – whilst you may be able to go to 512 bit or higher encryption it may cause issues obtaining the required licences. Also note some countries take such things very seriously.
