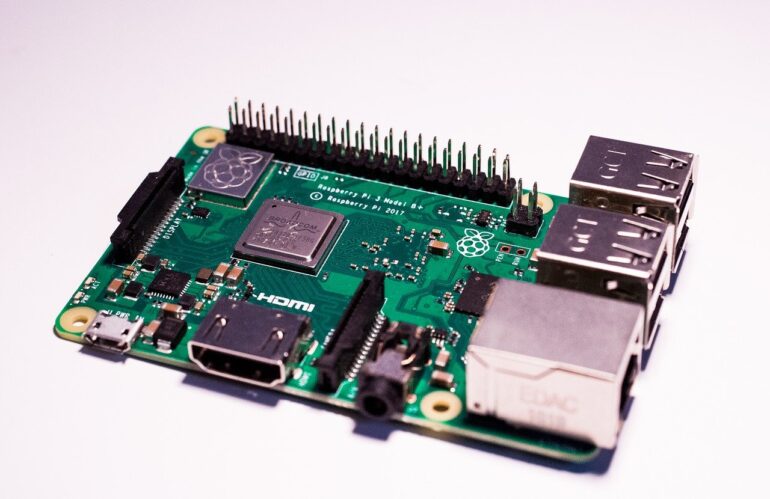
With more than 30 million units in existence, the Raspberry Pi provides for an accessible and low-cost way to play with an ARMv8 embedded device using the latest and greatest upstream sources. In this post we’ll walk through the steps required to build U-Boot, the Linux kernel and a filesystem, as well as the steps required for preparing an SD card and booting it.
Let’s start by getting a toolchain that will build 64bit ARMv8 binaries, we’ll grab the latest Linaro toolchain, unpack it and temporarily put it in our system path:
$ wget https://releases.linaro.org/components/toolchain/binaries/latest-7/aarch64-linux-gnu/gcc-linaro-7.5.0-2019.12-x86_64_aarch64-linux-gnu.tar.xz
$ tar -xf gcc-linaro-7.5.0-2019.12-x86_64_aarch64-linux-gnu.tar.xz -C ~/tools
$ export PATH=~/tools/gcc-linaro-7.5.0-2019.12-x86_64_aarch64-linux-gnu/bin:$PATH
Even though the Raspberry Pi can directly boot a kernel, we’d still like to boot via U-Boot. Thus let’s grab the latest version of mainline U-Boot, configure it for our Raspberry Pi and build a u-boot.bin binary:
$ git clone git://git.denx.de/u-boot.git # v2021.01-rc2-121-g5b8991c667f7
$ cd u-boot
$ make ARCH=arm CROSS_COMPILE=aarch64-linux-gnu- rpi_3_b_plus_defconfig
$ make ARCH=arm CROSS_COMPILE=aarch64-linux-gnu--j$(nproc)
$ cd ..
Next, we’ll grab the latest mainline kernel, configure it and build an ‘Image’ binary and a bcm2837-rpi-3-b-plus.dtb device tree file.
$ git clone git://git.kernel.org/pub/scm/linux/kernel/git/torvalds/linux.git # v5.10-rc4-368-g27bba9c532a8
$ cd linux
$ make ARCH=arm64 CROSS_COMPILE=aarch64-linux-gnu- defconfig
$ make ARCH=arm64 CROSS_COMPILE=aarch64-linux-gnu- -j$(nproc)
$ cd ..
A filesystem is also useful, for this blog post we’ll use Buildroot to build one – it’s quick, simple and we can easily modify it. In fact, out of the box, Buildroot will happily build all the components discussed in this post and create an SD card for us – however where is the fun in that? It’s worth pointing out that there are many alternatives here from distro creators such as Yocto – to Raspberry Pi specific distros – to standard distros such as Debian and Ubuntu. However let’s grab Buildroot and build a filesystem.
$ wget https://buildroot.org/downloads/buildroot-2020.02.8.tar.gz
$ tar -xf buildroot-2020.02.8.tar.gz
$ cd buildroot-2020.02.8
$ make raspberrypi3_64_defconfig
$ make
$ cd ..
In addition to a filesystem, the ‘raspberrypi3_64_defconfig’ will build a toolchain and kernel and SD card image – as this wasn’t needed we updated the config to use our downloaded toolchain, to not build a kernel and to not run a BR2_ROOTFS_POST_BUILD_SCRIPT.
We now need to prepare a micro-SD card. When the Raspberry Pi starts, the boot ROM will look for a FAT partition to find our boot images. Thus we need to create a partition table that includes a FAT partition. We’d also like to include a partition for the root filesytem. Let’s use sfdisk to achieve this as follows:
$ cat rpilayout
label: dos
label-id: 0x85baa6c1
device: /dev/sda
unit: sectors

/dev/sda1 : start=        2048, size=      524288, type=c, bootable
/dev/sda2 : start=      526336, size=    29726687, type=83

$ sudo sfdisk /dev/sda < rpilayout # where sda is your SD card
$ sudo mkfs.vfat /dev/sda1
Let’s copy the images that we’ve built to the SD card:
$ cp u-boot/u-boot.bin  /media/andy/646D-0E39/kernel8.img
$ cp linux/arch/arm64/boot/Image /media/andy/646D-0E39/
$ cp linux/arch/arm64/boot/dts/broadcom/bcm2837-rpi-3-b-plus.dtb /media/andy/646D-0E39/
$ dd if=buildroot-2020.02.8/output/images/rootfs.ext4 of=/dev/sda2
The Raspberry Pi starts execution in the GPU core with a first stage boot loader in the boot ROM. It then passes control over to a file named ‘bootcode.bin’ located in a FAT partition – this represents a second stage boot loader. It’s main purpose is setting up the SDRAM and jumping to a third-stage bootloader named ‘start.elf’ (along with its counterpart ‘fixup.dat’) that is also located on the FAT partition. This ‘start.elf’ has the ability to start the CPU core and boot our kernel or bootloader image.
The bootcode.bin, start.elf and fixup.dat files are closed-source but can be obtained from a GIT repo – let’s download these and put them in our FAT partition:
$ wget https://github.com/raspberrypi/firmware/archive/master.zip # bff705fffe59ad3eea33999beb29c3f26408de40
$ unzip master.zip
$ cp firmware-master/boot/{fixup.dat,start.elf,bootcode.bin} /media/andy/646D-0E39/
The start.elf bootloader is configured via a .txt file on the FAT partition – let’s configure it such that we can boot a 64bit binary and enable the UART.
$ cat config.txt
enable_uart=1
kernel=kernel8.bin
arm_64bit=1
core_freq=250
We can finally insert our SD card and turn the Raspberry Pi on – if everything has gone to plan then we should see U-Boot start. We’re powering our Raspberry Pi via the micro-B USB connector and are accessing the serial console through pins on the expansion header.
U-Boot 2021.01-rc2-00121-g5b8991c667f7 (Nov 21 2020 - 16:30:22 +0000)

DRAM:  948 MiB
RPI 3 Model B+ (0xa020d3)
MMC:   mmc@7e202000: 0, sdhci@7e300000: 1
Loading Environment from FAT... OK
In:    serial
Out:   vidconsole
Err:   vidconsole
Net:   No ethernet found.
starting USB...
Bus usb@7e980000: USB DWC2
scanning bus usb@7e980000 for devices... usb_new_device: Cannot read configuration, skipping device 1bcf:0b09
5 USB Device(s) found
       scanning usb for storage devices... 0 Storage Device(s) found
Hit any key to stop autoboot:  0
At this point we need to set up U-Boot environment variables such that U-Boot will load and jump to our kernel, with our device tree and suitable kernel command line arguments. Let’s do that after breaking into the U-Boot console.
> setenv bootcmd 'fatload mmc 0 ${kernel_addr_r} Image ; fatload mmc 0 ${fdt_addr_r} bcm2837-rpi-3-b-plus.dtb ; booti ${kernel_addr_r} - ${fdt_addr_r}'
> setenv bootargs 'console=ttyS1,115200n8 rootwait root=/dev/mmcblk0p2'
> saveenv
And we’re done. If we restart the Raspberry Pi we should see it boot into userspace (via the serial port on the GPIO expansion header):
Welcome to Buildroot
buildroot login: root

# uname -a
Linux buildroot 5.10.0-rc4-00368-g27bba9c532a8 #1 SMP PREEMPT Sat Nov 21 16:31:53 GMT 2020 aarch64 GNU/Linux
There are many articles online describing how to boot Linux on a Raspberry Pi – however we felt we’d share our steps as our focus may be a little different: we’re keen to build the latest mainline sources individually, with everything running 64bit and without depending on Raspberry Pi specific tools such as Noobs. Some of our future posts may also be based on the Raspberry Pi and so we thought it would be helpful to share the complete steps so others could reproduce. Our steps are based on the Raspberry Pi Model 3+, the steps will be different for other models.